

Sitecore Hacks for Easy Content Management & Editing: Part 2

In Part 1 of this post, we discussed two frequently asked questions from our clients around Sitecore’s content editing capabilities. Without further ado, here are the next two questions we’ve seen come up often in relation to this topic.
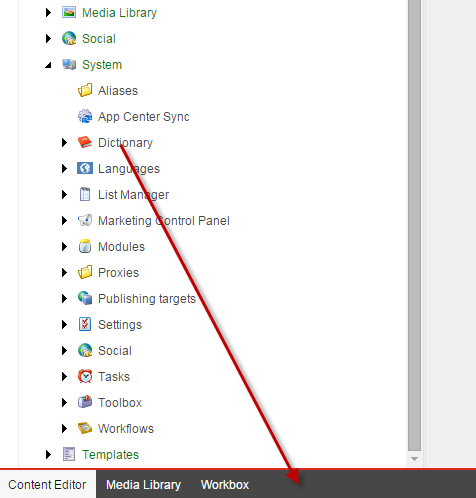
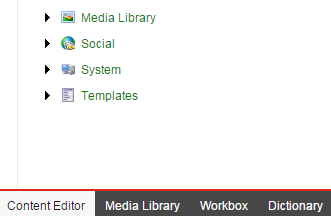
Providing Access to the Dictionary via the Content Editor Tray
Dan Murphy, Lead Solutions Architect
Generally, in a Sitecore workflow-enabled environment, non-admins will not be able to access the System folder where the Dictionary folder lives but they usually have access to the Content Editor tray. It is possible to expose the Dictionary here so that they may easily access and update Dictionary items as necessary.
Before:
After:
Steps for Adding the Dictionary to the Content Editor Tray:
- Login as an Admin and access the Sitecore Desktop.
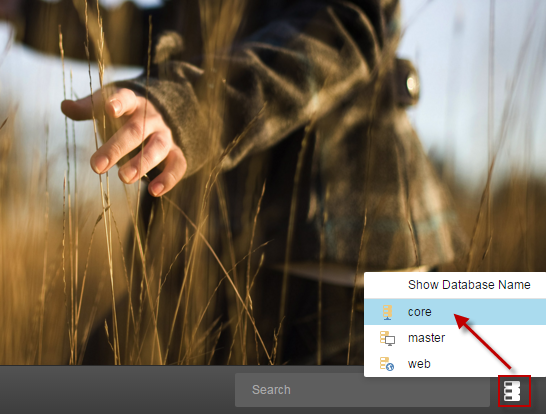
- Click on the Database icon at the bottom right and select ‘Core’ database.
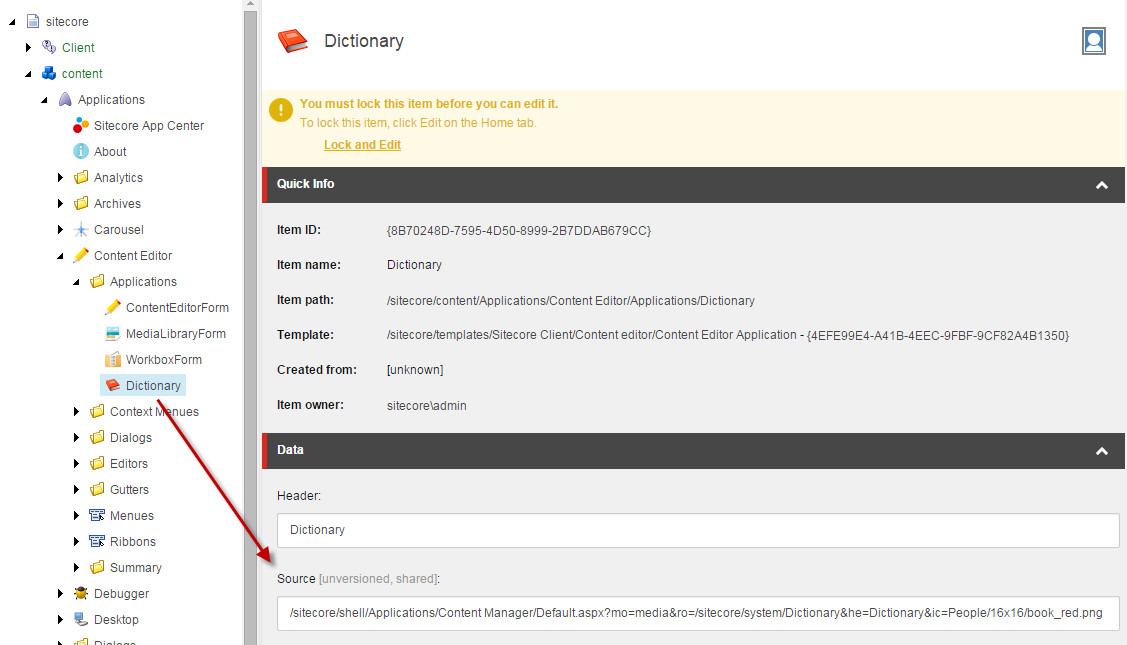
- Return to the Content Editor and navigate to sitecore\content\Applications\Content Editor\Applications. These are the default items that you would normally see here – Content Editor, Media Library, and Workbox.
- Add an item to represent your new "tab" in the tray.
- Name it "Dictionary" and set the following values:
- Header = Dictionary
- Source = /sitecore/shell/Applications/Content Manager/Default.aspx?mo=media&ro=/sitecore/system/Dictionary&he=Dictionary&ic=People/16x16/book_red.png
- Add (or ask your developer to add) this item to the core project for propagation to each environment.
Upload Multiple Media Files to the Media Library at Once
Sunil Nagpal, Senior Solutions Architect
Have you ever had a folder or ZIP of media files that you needed to upload to the Sitecore Media Library? Rather than upload one file at a time, you can use the Upload files (advanced) feature to upload multiple files at once.
Steps for Uploading Multiple Media Files At Once:
- Navigate to the folder in the Media Library where you want your media files to live.
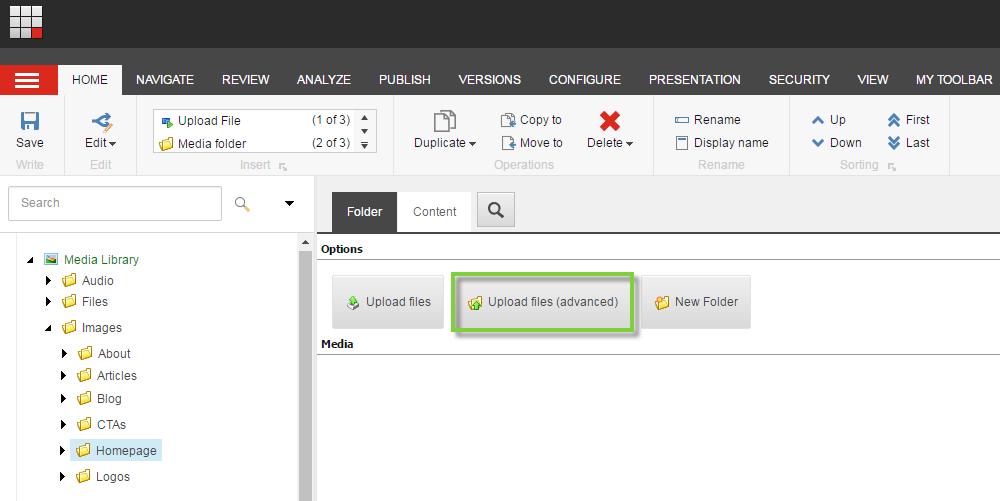
- Click the Upload files (advanced) button.
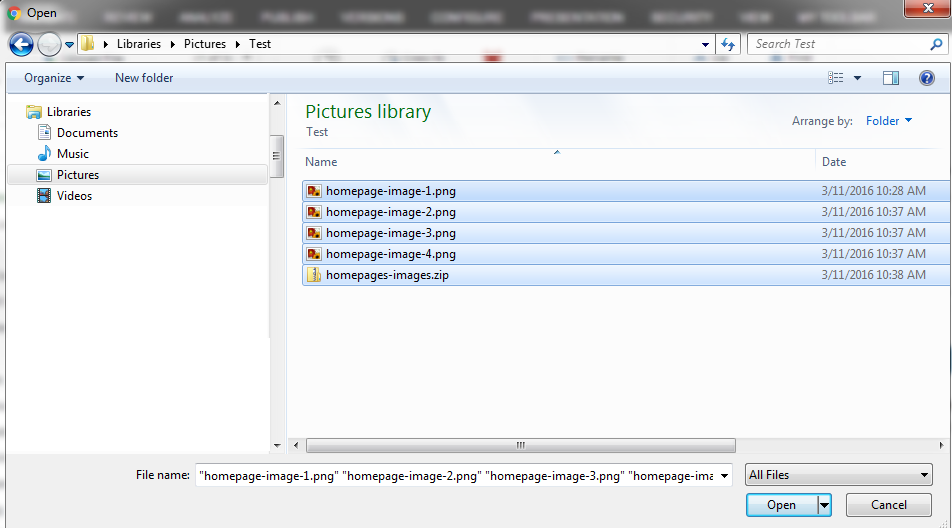
- Select the media files that you want to upload and click Open. You can select any media file types that Sitecore supports, as well as ZIP files.
- On the next screen, you can do a few things:
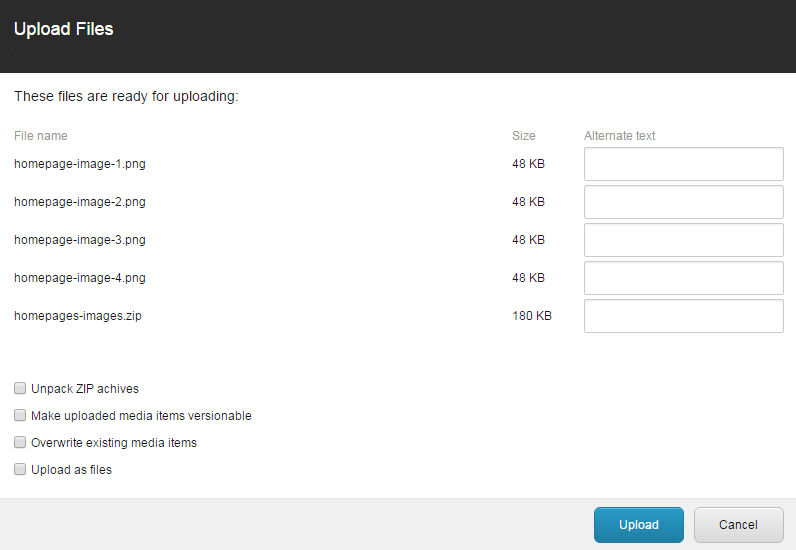
- Set Alternate text for files being uploaded – Alternate text is displayed to users when a given media file cannot be loaded on a page.
- Unpack Zip archives – Check this box to have Sitecore unpack ZIP files after uploading.
- Make uploaded media items versionable – Check this box to allow versioning when the uploaded media files are edited.
- Overwrite existing media items – Check this box to overwrite existing files with the new ones if their names are the same. If unchecked, the postfix including the number will be added to the new filename.
- Upload as files – Check this box to upload the files as filesystem media. If unchecked, the files will be uploaded as database media.
- After making your selections, click the Upload button and Sitecore will upload your files with the settings you made and in the location you specified.

Add a comment below to let us know if there are any other questions about Sitecore’s capabilities that you’d like us to capture with this series and stay tuned for the next post!