

How to Finish Connecting Sitecore Identity to SAML for SSO

In Part One of this series, we showed you how to build a plugin to connect the Sitecore Identity server to SAML2, and demonstrated how to use SAML2 claims to drive Sitecore login and role assignment. Now we'll make this a true starting point for your implementation by adding support for configuration, certificate signing, and advanced handling of role properties and claims.
Managing Configuration
Sitecore Identity is a .NET Core application, so it runs on a different code base from classic Sitecore. Because of that you don’t have access to standard configuration files or the Sitecore object factory. However, Sitecore has provided a powerful equivalent with the Sitecore.Foundation.Configuration library, which is based on Microsoft's .NET Core Microsoft.Extensions.Configuration library.
Instead of working with .config files, Sitecore Identity uses XML files, which are patchable and use syntax conventions like classic Sitecore. They also support command line and environment variable patching, which can be helpful for containerized deployments. See Sitecore's documentation for more details.
To access these configuration files, use dependency injection to access an instance of the ISitecoreConfiguration object. With that in hand, you can access individual properties by providing the full XML path, with colon delimiters, like this:
_sitecoreConfiguration.GetValue(pathString); For example, using this value, you can set the button text to a value specified in configuration.
Of course, it's cumbersome to specify that full path for each property, so instead you can create a class and bind all the properties in that configuration section to an instance of that class. This is the pattern used by Sitecore in the AzureAD connector that ships with Sitecore Identity. Since most of the properties in our configuration file map to the IdentityProvider class, you can subclass that and add your own properties. The process creates an instance of the class, and calls "Bind" to map the XML values to the object:
_settings = new Saml2Settings();
_sitecoreConfiguration.GetValue<string(pathstring).bind(_settings);></string(pathstring).bind(_settings);>
Look at the ConfigureSitecore.cs code sample at the end of this article to see how this works in practice.
Signing Requests
If your Identity Provider (IDP), the system that the user signs in to, is configured with a public key, and you load that public key either automatically through their /metadata endpoint or via your configuration, Sustainsys.SAML2 will automatically validate that the response has not been tampered with.You can use a tool like the Chrome extension SAML-Tracer and the Validate SAML Response screen to verify this.
Verify the signature on a response is valid by entering the raw binary or compressed XML, unformatted, with no white spaces. The validation should pass, but if you modify a value, such as an assigned role, the validation will fail. You can also do this programmatically, if you want to gain familiarity with the process, though as noted, this is handled automatically by the SAML2 library.
Creating a signature requires a certificate private key, but only the public key is needed to validate it. So, if you’re confident your IDP has safeguarded their private key, you can be confident that the values returned by the SAML response have not been tampered with.
Some IDPs require that outgoing requests be signed as well. If you create or have access to a certificate in PFX format and the accompanying password, you can configure the SAML2 provider to sign authentication requests. Now Sustatinsys.SAML2 will append a signature to the query string on outgoing requests if the IDP requests this, or if you specify SigningBehavior.Always. See lines 61-69 from the ConfigureSitecore.cs code sample.
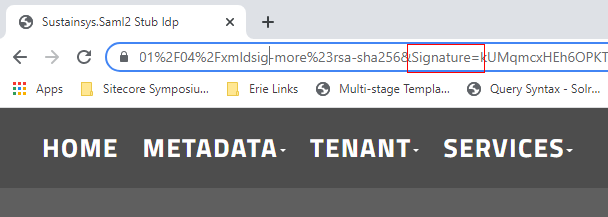
Please bear in mind that if you send a signature to the IDP that it did not request, it probably won't validate it. The SAML2 stub IDP above did not complain when we added extra letters to the signature. However, if your IDP requires signed requests, you should be in a good position to implement this.
Mapping User Properties
When a visitor logs into Sitecore using this process, a permanent Sitecore user is created, and the IDP username is mapped to the new user using a Core/Security database table, UserLogins. You can disable permanent user creation by setting the IsPersistentUser flag in configuration.
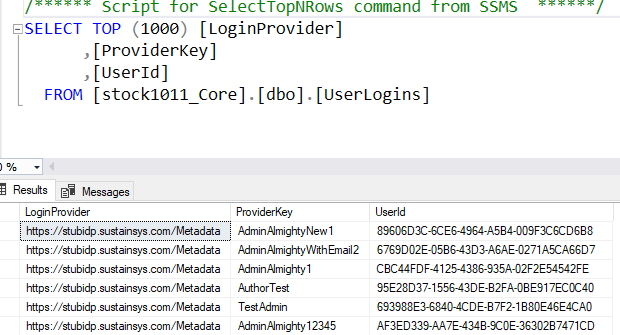
The username is created using a class DefaultExternalUserBuilder, which creates a 10-character hash value based on the LoginProvider and ProviderKey values in the table shown in the previous screenshot. Since only the first 10 characters are used, there is a small possibility of collisions, so the class has logic to create new hash values by prepending a "$" to the pre-hashed value until a new username is found. Because the login to user mapping is stored in a table above, you can be confident that the hash value won't change, but it’s a less than ideal value to appear in Sitecore item history.
As Derek Correia has pointed out, if you map an incoming claim to "name", and take the additional configuration steps he describes (adding an entry to CM configuration to wire the claim to a profile property), then the username will show to the user, and will be visible in the User Manager, retaining audit traceability in spite of the hashed value.
However, you can override this functionality by subclassing DefaultExternalUserBuilder, and force creation of a non-hashed username based on the ProviderKey returned from the IDP. See the following code samples for an example implementation, CustomExternalUserBuilder.cs. If you take this course, you must ensure that there are no conflicts with existing users. The sample implementation handles this by defaulting to the hash value if a user already exists with that name.
Note that only claims that are defined in SitecoreIdentity configuration at Sitecore:IdentityServer:IdentityResources:SitecoreIdentityResource:UserClaims will be exported to Content Manager, so if you want to export a claim to Sitecore CM to set the client language or set the visitor's icon, you’ll need to add the outgoing claim to this list. See SamlConfiguration.xml, lines 5-13. You also need to set the claim up on the CM in the MapUserClaimsToProperties configuration, as described in Derek Correia's post. See FriendlyUserName.config, lines 7-26.
In the SamlConfiguration.xml file, you will find that in addition to role claims, a portrait claim has been added for both Administrators and Authors. Because of the changes described above, these now set the user avatar to one that identifies the role.
![]()

Trimming Claims
In a corporate environment, the Single-Sign-On IDP will provide a very large number of claims, for the different applications that employees have access to, such as HR applications like Namely, ticketing systems like Jira, time tracking systems like Mavenlink, and so forth. And each user in each system will have different levels of access. The head of HR might have access to see salary information, for example. All this information about systems and rights comes back in the SSO response, unless the IDP has the capability of filtering it by client application, "Service provider" or "SP" in the single-sign-on vocabulary. Since all these claims are converted into a cookie, it is easy to exceed the application limits for cookie sizes. Sitecore has a Knowledge Base article on this, but the specified resolution didn’t work in our experience. However, the SAML2 library does fire an event when the claims are about to be converted Notifications.AcsCommandResultCreated, which allows you to trim the claims down to the ones that are needed. See ConfigureSitecore.cs, lines 71-78.
Sample Code
The code below is provided as an illustration and is provided without warranty. However, it should give you a solid foundation for building a production SSO implementation with Sitecore Identity and the Sustainsys SAML2 library. Note that if you run into SAML2 library issues, Sustainsys offers support, and the module author is very active on Stack Overflow. Please see Part One of this series for the Sitecore.IdentityServer.Host.deps.json modification that is necessary to avoid DLL version conflicts.
This file has been extended from Part One as discussed in this post. Note the use of configuration from settings, and the inclusion of signing logic.
This file models custom configuration values.
Configuration for the identity server plugin. Note the inclusion of the "Portrait" patch to enable avatars to be passed through to the CM.
An optional refinement to override Sitecore's external username logic.
Enables the above customization, and sets name, email, and icon fields to be applied to user profiles.
Wrapping Up
In this article, we took our starting point we established in Part One, and added support for configuration management, request singing, advanced profile manipulation, and a way to deal with issues caused by the large number of claims in a production environment. We also recommend the following resources to help you through this process.
- Sustainsys documentation
- Stack Overflow posts
- Derek Correia's articles on Sitecore Identity
- George Chang's post on wiring Sustainsys to CM login
- Pluralsight on SAML2 and Asymmetric Cryptography
- Sitecore documentation on Sitecore Host and Sitecore Identity, and in particular, the discussion of building a federated gateway
- SAML testing tools: https://www.samltool.com/index.php
- Microsoft documentation on XML Enveloped Signatures, which Saml2 uses to sign requests and responses
Hopefully you found this article helpful. If you’d like to learn more about how to connect Sitecore Identity to Sustainsys.SAML2 or like help integrating another system with Sitecore Identity to allow single sign-on, please contact us. You can also learn more about our Sitecore experience or read our latest thoughts on Sitecore.