

A Technical Guide to Drupal 8: Functional Testing

The example form in the custom module that we previously created provides us with a solid starting point for extending forms. However, before we embark on this journey, we need to ensure that we don't break existing functionality in the process.
The Need for Functional Testing
There is a difference between clicking around to test if an application is working and letting the system determine if it is. Scripting out these tests provides a much more reliable way of ensuring the application is behaving the way you would expect.
Writing tests provides real value by proving your code is working as desired, helping to catch regressions as they happen, and building confidence in the overall health of the application. At the same time, it frees up QA resources from spending hours on manual testing and allows them to do more focused, valuable QA work on the project.
Getting Started with Functional Testing in Drupal
Drupal 8 ships with SimpleTest, Drupal’s custom testing framework that allows for either functional or unit tests. Since our form asks for user input and submits it using the FormAPI, we only need to test its functional aspects. The FormBase class that our FruitForm class extends is covered by test cases in the core, so we only need to write tests for our specific needs. Here’s how to implement functional tests with SimpleTest in Drupal 8.
To enable SimpleTest, head to the Module list in the admin area and enable the 'Testing' module.
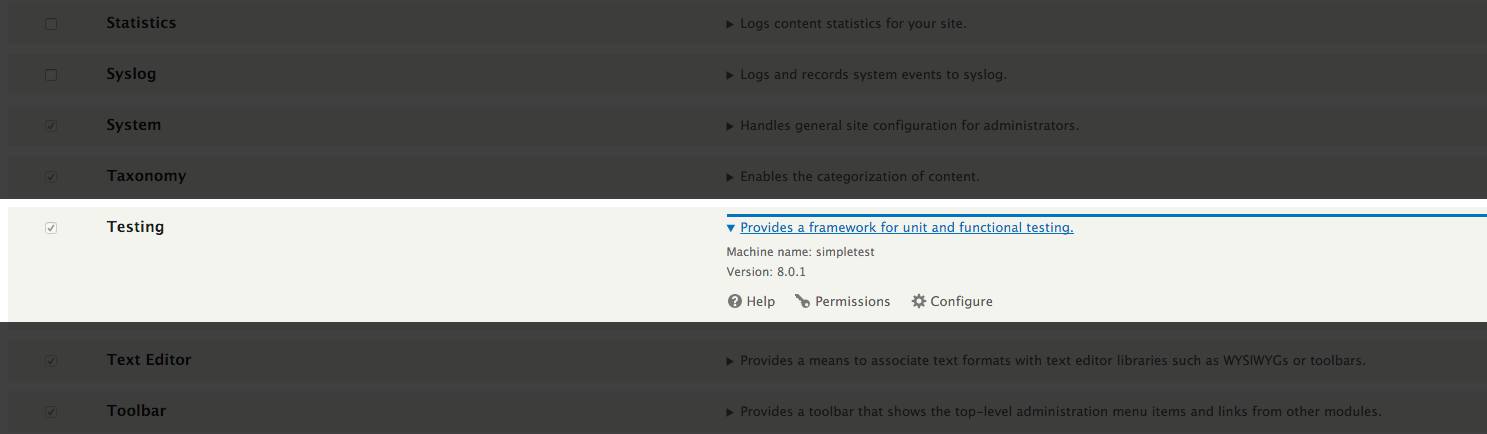
Enable the 'Testing' module
So what should we test for now that we have this enabled? We can start with the following:
Check whether the:
- Fruit form URL is accessible to anyone
- Fruit form URL presents a form
- Fruit form has a submit button
- Fruit form select options are all present and available
- User sees a confirmation message upon submit and is redirected appropriately
You must be thinking, "Well this isn't much. I could do this myself in 2 minutes!" You're probably right but remember, we don't just test things once in the course of development. In a real world scenario it is likely that tests like this would be run hundreds of times as code is changed or features are added. These tests can be executed independently in the background and they can be triggered and run by build tools such as Jenkins in a continuous integration setup.
Scripting the Functional Tests
Filename Convention
All files must have 'Test' at the end of the filename in order to be identified by the system as a code file containing tests for SimpleTest. They must be placed in a directory called 'Tests' and be in the src directory of a module to be discoverable by Drupal.
Example: mymodule/src/Tests/MyModuleTest.php
Back in the testmodule folder we are going to create a 'Tests' directory under the 'src' directory. Following this, we will create a 'FruitFormTest.php' file to hold our test methods.
The way SimpleTest operates is it stands up a Drupal installation on your current database to perform the tests in an isolated environment without damaging the current application. Since it is installing Drupal, we need to inform SimpleTest on which modules need be installed in order to perform the tests. We can do this by providing a variable which holds an array of modules. We only need the basics, so installing the node and testmodule is all we have to define.
Let's start with the first scenario - simply determining if the form URL is accessible to anyone. For this, we need to instruct SimpleTest to access the URL and then check if our HTTP response is 200 OK. This lets us know that a visitor can access our form without issue.
SimpleTest provides easy methods to perform these checks:
/**
 * @file
 * Contains \Drupal\testmodule\Tests\FruitFormTest.
 */

namespace Drupal\testmodule\Tests;

use Drupal\simpletest\WebTestBase;

/**
 * Provide some basic tests for our FruitForm form.
 * @group testmodule
 */
class FruitFormTest extends WebTestBase {

  /**
   * Modules to install.
   * @var array
   */
  public static $modules = ['node', 'testmodule'];

  /**
   * Tests that 'testmodule/ask-user' returns a 200 OK response.
   */
  public function testFruitFormRouterURLIsAccessible() {
    $this->drupalGet('testmodule/ask-user');
    $this->assertResponse(200);
  }
}
Simple enough, right? drupalGet() directs SimpleTest to our form URL and assertResponse() checks that it was a 200. This is the equivalent of opening up the URL in your browser, except we are automating it.
Now when you head to the testing section of the admin and run the tests defined for testmodule, you should see the following result:
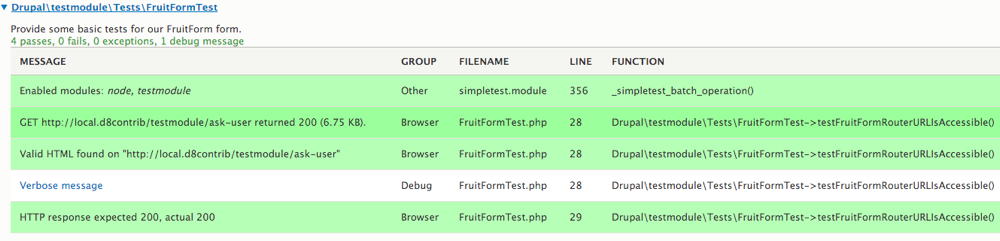
Green is good.
SimpleTest/Drupal records a play-by-play success/fail of each step in the code and you can see it was able to access the URL successfully. If for some reason it wasn't able to, the tests would be highlighted in red indicating that they failed.
Let’s continue defining tests. Before we check that our form fields exist, let’s check that the submit button is on the page. Without it, the rest of the tests are rather meaningless as our user wouldn’t even be able to submit the form! We can check that an element exists by using the assertFieldById() method:
  /**
   * Tests that 'testmodule/ask-user' returns a 200.
   */
  public function testFruitFormRouterURLIsAccessible() {
    $this->drupalGet('testmodule/ask-user');
    $this->assertResponse(200);
  }

  /**
   * Tests that the form has a submit button to use.
   */
  public function testFruitFormSubmitButtonExists() {
    $this->drupalGet('testmodule/ask-user');
    $this->assertResponse(200);
    $this->assertFieldById('edit-submit');
  }
Great, we are getting the hang of this! Let's fill in the rest of our tests and really start backing our code with confidence.
We now have two things left - check that our options are present to the user and that submitting the form has the expected result:
  /**
   * Test that the options we expect in the form are present.
   */
  public function testFruitFormFieldOptionsExist() {
    $this->drupalGet('testmodule/ask-user');
    $this->assertResponse(200);

    // check that our select field displays on the form
    $this->assertFieldByName('favorite_fruit');

    // check that all of our options are available
    $fruits = ['Apple', 'Banana', 'Blueberry', 'Grapes', 'Orange', 'Strawberry'];

    foreach ($fruits as $fruit) {
      $this->assertOption('edit-favorite-fruit', $fruit);
    }

    // check that Pizza is not an option. Sorry, pizza lovers.
    $this->assertNoOption('edit-favorite-fruit', 'Pizza');
  }

  /**
   * Test the submission of the form.
   * @throws \Exception
   */
  public function testFruitFormSubmit() {
    // submit the form with Blueberry as a value
    $this->drupalPostForm(
      'testmodule/ask-user',
      array(
        'favorite_fruit' => 'Blueberry'
      ),
      t('Submit!')
    );

    // we should now be on the homepage, and see the right form success message
    $this->assertUrl('');
    $this->assertText('Blueberry! Wow! Nice choice! Thanks for telling us!', 'The successful submission message was detected on the screen.');
  }
Given that the form and the favorite fruit field are present, we need to ensure that our approved list of fruit is available as well.
Finally, we test that submitting the form with the value of Blueberry successfully redirects the user to the front page and shows a confirmation, which is the behavior we defined in the FruitForm class.
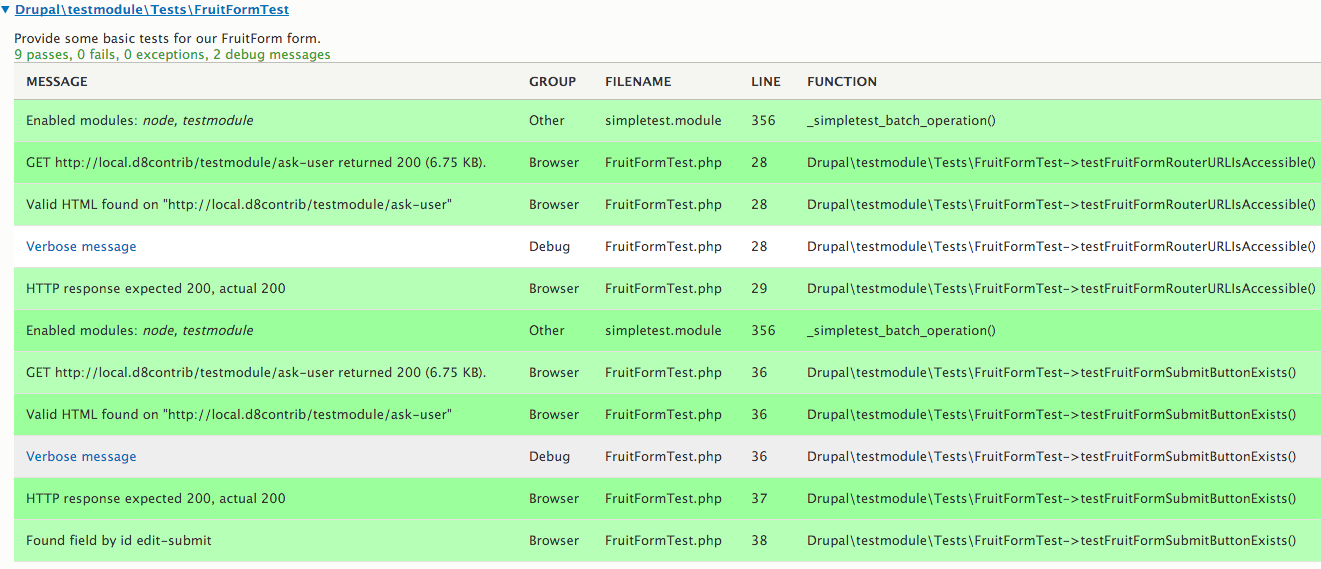
Everything passes.
Writing Tests Before Writing Code
Now that we know how to write tests, we can ensure our features are delivered to specification and working as we expect. We are free to expand on the tests and so long as we have well written tests, we are on track to meeting the requirement(s). Astute developers would advocate writing all of your tests before you write any code; they are correct. Now that we have a starting point, a future post will look at extending the functionality of this form, except we will write all of our tests first, which is a concept called Test Driven Development. We will cover that more in a future article.
Give the concepts above a try in your code and feel free to browse the example code for this post. Join in on the discussion and let us know how it goes.